Hello My Friends,
This is the last Recipe Forum that I will be doing until after Memorial Day. I'll be spending time with my Family and at Church this Weekend and then on my Monday, we'll be Celebrating Memorial Day with the Neighborhood for the 3rd straight year. Last year there were over 20 families that attended, and we're hoping for even more this year.
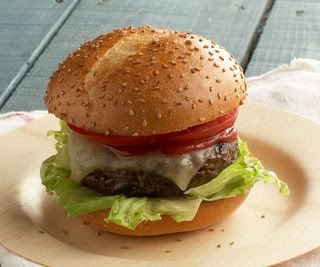
For many Folks, Memorial Day is the first time each Season that they fire up the grill for a little outside food, fun, and Family festivities. Grilling up a burger that one your guests will rave about isn't exactly rocket science, but there are a few tricks to elevating your burgers to ultimate status. To prevent burgers from falling apart, turn them only once, and never press on a burger with a spatula. All you're doing is pushing all the juice out of the burger. Another trick to getting an evenly cooked burger is to put a depression in the center of each patty before you put it on the grill.
Classic Ultimate Hamburgers

Ingredients
1-1/2 lb. 80% lean ground chuck
8 oz. 90% lean ground sirloin
Kosher salt
Freshly ground black pepper
3 Tbs. unsalted butter, at room temperature
6 good-quality hamburger buns
6 slices dead-ripe tomato
6 iceberg or romaine lettuce leaves
Condiments of your choice
Directions
Oil the grill racks. Preheat your grill using all burners set on high and with the lid closed for 10 to 12 minutes.
Put the meat in a medium bowl and season with salt and pepper; go light on the salt here because we’re going to add more. Carefully, being as tender as you possibly can, use your hands to mix the seasonings into the meat and then form it into 6 patties that are 1/4 to 1/2 inch thick and slightly wider than the buns you intend to use. Take your thumb and make a good depression in the middle of each burger. Season the patties with salt and pepper. Slather some butter on the cut side of your hamburger buns.
Place the burgers on the grill, close the lid, and cook for 4 to 6 minutes. Turn the burgers and cook for an additional 4 minutes for a medium-pink doneness. If you want a well-done burger, cook for 12 to 15 minutes. They should start to feel firm when pressed. If you want to use an instant-read thermometer, do like the health inspectors do and go in through the side, not the top.
If you feel your burger is not complete without cheese, then add a slice to each patty during the last 2 minutes of cooking time. The cheese should melt nicely but not turn to liquid, and will continue to melt even after you take the burger off the grill.
During the last minute of the cooking time, add your buns to the grill, cut side down, and grill until lightly toasted.
Hamburgers are best served straight off the grill, into the bun, into your mouth. If the burgers are going to have to sit for a few minutes, place them on one platter and the buns on another instead of inserting the burger between the buns. Top each burger with tomato and lettuce, and dress with the condiments of your choice. Serves 6.
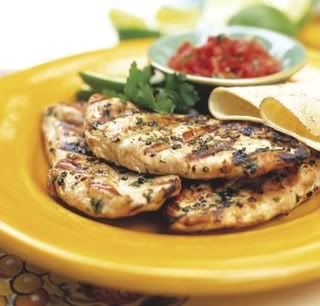
For those at your get-together who shy away from Red Meat, like myself, here's some tasty Grilled Chicken Breasts that will have them wanting your recipe.
Herbed Grilled Chicken Breasts

Ingredients
6 boneless skinless chicken breast halves (6 to 8 ounces each), trimmed and rinsed
Kosher salt and freshly ground black pepper
Crushed red chile flakes
3 cloves garlic, minced
2 tablespoons chopped fresh rosemary, flat-leaf parsley, or other fresh herb
1/4 cup fresh lemon juice, plus 6 lemon wedges for serving
1/4 cup extra-virgin olive oil; more for drizzling
Directions
Lightly wet a chicken breast with cold water and set it between two sheets of plastic wrap. Pound it into a broad, flat sheet about 1/4-inch thick (called a paillard), using a meat pounder, the side of a heavy cleaver, or a skillet. Pound the other breasts into paillards the same way and arrange them on a baking sheet.
Generously season each paillard on both sides with salt and pepper and a pinch or two of chile flakes. Sprinkle both sides with the garlic and rosemary. Drizzle both sides with the lemon juice and olive oil and pat into the meat with your fingertips. Refrigerate the paillards for 20 minutes while you prepare the grill.
Heat a gas grill to high or prepare a hot charcoal fire. Brush and oil the grill grate.
Arrange the paillards on the grill grate and grill until cooked and firm to the touch, 1 to 2 minutes per side. (Use a long, wide spatula to move and turn the paillards.) Transfer the paillards to a platter or plates. Drizzle with olive oil and serve immediately with lemon wedges for squeezing. Serves 6.
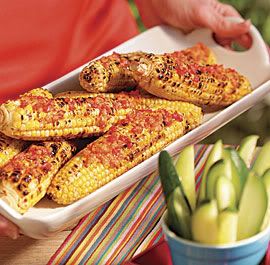
For a delightful and delicious side dish, try some Grilled Corn on the Cob. The butter in this dish is at once sweet and tangy, a bright addition to plain old grilled corn on the cob.
Grilled Corn on the Cob with Thyme & Roasted Red Pepper Butter

Ingredients
4 oz. (1/2 cup) unsalted butter, softened to room temperature
2 jarred roasted red peppers, drained well, patted dry, and fi nely chopped (1/2 to 2/3 cup)
1 large shallot, minced (1/4 cup)
1-1/2 Tbs. sherry vinegar
1 Tbs. chopped fresh thyme
2 tsp. kosher salt
1/2 tsp. freshly ground black pepper; more as needed
8 ears corn, shucked
2 Tbs. olive oil
Directions
Put the butter, red peppers, shallot, vinegar, 2 tsp. of the thyme, 1 tsp. of the salt, and the black pepper in a food processor and pulse until blended (it's fine if it's still slightly chunky and looks a little separated). Transfer to a large piece of plastic wrap and roll tightly, twisting the ends so the bundle acquires a sausage shape. (Store in the refrigerator for up to 1 week.) When ready to grill the corn, slice the butter into 1/3-inch-thick rounds.
Heat a gas grill to medium or prepare a low charcoal fire. If desired, cut each ear of corn in half. Toss the corn with the oil, the remaining 1 tsp. salt, and a few grinds of black pepper. Put the ears on the grill and if using gas, reduce the heat to medium low. Cover and grill the corn, turning every couple of minutes, until browned all over and tender, about 15 minutes. Transfer to a large platter, top with about half of the butter and the remaining 1 tsp. thyme. Serve, passing the remaining butter on the side. Serves 8.
Hint: If there is any leftover, for a real treat you might toss grilled shrimp with leftover Thyme & Roasted Red Pepper Butter and a squeeze of lime juice.
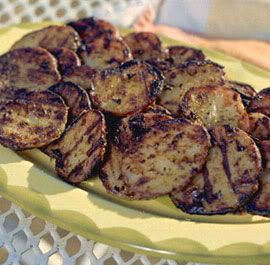
Finally, it wouldn't be a Barbecue without some Potatoes, however, instead of the same old Potato Salad, why not try some Grilled Potatoes for a change? By par-cooking your potatoes before they go on the grill, they'll have a soft, almost cakey texture on the inside when they're done, but they'll still have that terrific grilled flavor. The mayonnaise not only adds flavor to the potatoes, but it also helps to keep them from sticking to the grill.
Rosemary-Mustard Grilled Potatoes

Ingredients
1 lb. medium red- or yellow-skinned potatoes
Kosher salt
1/4 cup mayonnaise
2 Tbs. Dijon mustard
2 tsp. chopped fresh rosemary
freshly ground pepper
Directions
Wash the potatoes and cut them into 3/8-inch slices. Cover the potatoes with cold water and 1 Tbs. salt in a saucepan. Bring to a boil, lower to a gentle simmer (you don't want them to break up), and cook until they're almost but not quite fully cooked, 4 to 6 minutes. The potatoes will still be a little hard in the center, but the outer edges will look opaque. Drain in a large colander and rinse with cold water until they're cool; handle them gently. Spread them out on clean dishtowels and let them sit at room temperature (for up to an hour) until you're ready to grill them.
Light a charcoal grill and allow the fire to reach a medium-hot temperature (the top of the coals should be 5 to 6 inches from the grill grate, and you'll be able to hold your hand over the fire for no more than 3 to 4 seconds when it's medium hot). Alternatively, heat the entire surface of a gas grill until it reaches medium hot.
In a medium bowl, combine the mayonnaise, mustard, rosemary, and salt and pepper to taste. Toss the potato slices with the mayonnaise mixture until the potatoes are well-coated. Put the potatoes on the grill grate in one layer, directly over the fire. Cook for 3 to 6 minutes or just until deep golden brown and crisp. With tongs, turn the pieces over to the other side. Cook until that side is deep golden brown and crisp, another 3 to 6 minutes. Remove and serve immediately. Serves 4-6.
There you have it my Friends. A Traditional Memorial Day Cookout. For a little something different, check over at my Healthy Crockpot Cooking Forum for an alternative to standing over a hot grill this weekend. Either, way enjoy some good, wholesome Famiy Time this weekend and remember our Troops, both present and past, who made it possible for you to have this Celebration in the first place.

Have A Happy & Blessed Memorial Day My Friends,
Phil